Residential Solar — Home Assistant Integration
Home Assistant Integration
Your inverter is generating data every second — panel voltages, battery state-of-charge (how "full" your battery is, like a fuel gauge), grid import/export — and almost none of it reaches you unless you actively pull it in. Home Assistant turns that raw telemetry into dashboards, automations, and alerts. This section covers how to connect the most common hybrid inverters, build out the Energy Dashboard, and write automations that shift loads to match your solar curve.
Inverter HA Compatibility Matrix
Not all inverters are created equal from a Home Assistant perspective. Local integrations are strongly preferred over cloud APIs — they're faster (sub-second polling vs. 5-minute cloud lag), work when your internet is down, and don't depend on a vendor's server staying alive for the next 15 years.
| Inverter | Integration | Connection | Battery Control | Local? | Difficulty |
|---|---|---|---|---|---|
| GoodWe ET/EH | Native core | Local UDP :8899 | Yes | ✅ | Easy |
| Fronius | Native core | Local HTTP (SolarAPI) | N/A | ✅ | Easy |
| Huawei SUN2000 | HACS wlcrs/huawei_solar |
Modbus TCP :502/6607 | Full | ✅ | Medium |
| Deye/Sunsynk | HACS home_assistant_solarman |
Local Modbus via WiFi logger | Yes | ✅ | Medium |
| Growatt | Native core | Cloud API (5-min polling) | Limited | ❌ | Easy |
| SolarEdge | Native core | Cloud or Modbus TCP | Via Modbus | Partial | Medium |
PH Sweet Spot
Deye + Solarman = the cheapest hybrid inverter setup with full local Home Assistant control. Deye units (often sold under the Sunsynk brand) are widely available from Manila distributors and pair natively with the home_assistant_solarman HACS integration via the built-in WiFi data logger — no extra hardware required.
Premium Pick
Huawei SUN2000 = the most feature-rich HA integration available. Per-optimizer panel monitoring, full battery schedule control, and the most complete sensor set of any inverter in this comparison.
Huawei SUN2000 Deep-Dive
The Huawei SUN2000 earns its "premium pick" status through a genuinely unique feature: per-optimizer monitoring. Every panel gets a SUN2000 optimizer attached at the module, and each optimizer reports its own voltage, current, and power back through the inverter. Home Assistant exposes all of it.
Why this matters in practice: With per-optimizer monitoring, you can see that Panel #7 dropped 30% output — likely bird droppings, early-onset shading from a new tree, or a failing bypass diode. Without this level of data, you'd only notice a drop in your total daily yield and have no idea which panel to inspect. With optimizer-level data, you walk straight to the problem.
HACS setup: Install wlcrs/huawei_solar from HACS (Home Assistant Community Store). The integration is actively maintained and supports the full SUN2000 feature set.
Connection options:
- Port 502 — Standard Modbus TCP, used on most firmware versions
- Port 6607 — Used on newer firmware (2023+); some installers configure this by default
- Direct Ethernet — Connect a cable directly from your router or switch to the inverter's RJ45 port
- Via SmartLogger — Huawei's optional monitoring box; useful for multiple inverters or sites with long cable runs
Firmware: 2023+ firmware is recommended. Older firmware may not expose battery management registers or per-optimizer data.
Elevated installer permissions: By default, the SUN2000 integration exposes read-only monitoring. To unlock full battery control, you need to enter the installer-level password (provided by your installer or available in the Huawei FusionSolar documentation for your region). Once elevated, you gain:
- Force charge from grid during TOU off-peak windows (e.g., midnight–6 AM)
- Force discharge to load during on-peak hours to avoid buying expensive grid power
- Grid export limits (required if your utility caps feed-in)
- SOC management — set minimum and maximum battery levels to protect battery lifespan
Sensors exposed by the integration:
- Inverter output power and cumulative energy (daily/total)
- Battery SOC, charge power, discharge power, temperature
- Per-string MPPT data (Maximum Power Point Tracking — the inverter's built-in optimizer that squeezes maximum power from your panels; this shows voltage, current, and power per string)
- Per-optimizer voltage, current, and power for every panel
- Grid import power, grid export power
- Daily and total yield
Optimizer monitoring in action
After installing a mango tree that started shading the west side of your roof in the afternoons, you notice your 3–5 PM generation dropped by 400W compared to the same week last year. With per-optimizer data in Home Assistant, you can pull up a history graph for each panel and confirm that Panels 14, 15, and 16 on the west string are at 40% of their peers during that window. You trim the tree, generation recovers. Without optimizer data, you'd be guessing — or paying for an installer visit to test each panel manually.
 How your solar system connects to Home Assistant — inverter data via Modbus/WiFi, energy monitoring via Shelly EM, and solar forecasts from the cloud. HA processes it all into dashboards, automations, and notifications.
Energy Dashboard Setup
The Energy Dashboard is Home Assistant's built-in visualization for electricity flows. It requires sensors with state_class: total_increasing and a unit of kWh — it does not accept power sensors in watts. Most inverter integrations provide these automatically; for those that only expose power (W), see the Riemann Sum helper step below.
- Navigate to Settings → Dashboards → Energy
- Electricity Grid: Add your grid consumption sensor (energy imported from grid, kWh) and your grid return sensor (energy exported to grid, kWh). These are what your meter measures.
- Solar Panels: Add your solar production energy sensor. Must be
kWhwithstate_class: total_increasing. This sensor should represent total PV generation, not net export. - Home Battery: Add your battery charge energy sensor and battery discharge energy sensor separately. The dashboard uses both to calculate self-consumption accurately.
- Solar Forecast: Add a forecast source to see predicted generation overlaid on your actual. Two options:
- Forecast.Solar — Free, configures with your panel azimuth/tilt/kWp, reasonable accuracy
- Solcast — More accurate (uses satellite cloud imagery), free tier covers residential use (up to 10 forecasts/day)
- Riemann Sum helper: If your inverter integration only exposes power in watts rather than cumulative energy in kWh, you need to create a helper to convert. Go to Settings → Devices & Services → Helpers → Add Helper → Integration - Riemann sum integral. Set the input sensor to your power sensor (W), the method to "Left" or "Trapezoidal", and the unit prefix to "k". This creates a derived kWh sensor that the Energy Dashboard can consume.
Solar Automations
Once your inverter is in Home Assistant and your energy sensors are flowing, you can close the loop: automatically shift loads to match your solar production.
PV Excess Control (Recommended)
The PV Excess Control HACS integration is the most capable option for priority-based solar excess management. Rather than a simple on/off threshold, it maintains a priority queue of appliances and allocates excess solar intelligently:
- Priority levels 1–1000 — Assign relative priority to each appliance. High-priority loads (EV charging, water heater) get fed first; lower-priority loads (pool pump, dishwasher) only activate when there's sufficient excess after higher-priority devices are satisfied.
- Dynamic EV charging current — For EV chargers with adjustable current (OCPP or Modbus-compatible), PV Excess Control modulates the charge rate between 6 A and 32 A to absorb exactly the available excess without importing from the grid.
- Battery-aware modes:
- Battery First — Fill battery to target SOC before routing excess to appliances
- Appliance First — Run appliances from solar before sending excess to battery
- Balanced — Split excess between battery and appliances based on configurable ratio
- 24-hour solar forecast integration — Uses your Forecast.Solar or Solcast data to look ahead and decide whether to save excess now for a cloudy afternoon or spend it immediately.
Manual Automation Example
For simpler setups or one-off automations, standard HA YAML works well. The pattern below monitors grid power (negative = exporting, positive = importing) and controls a resistive water heater accordingly:
automation:
  - alias: "Turn on water heater when solar excess > 2kW"
    trigger:
      - platform: numeric_state
        entity_id: sensor.grid_power
        below: -2000
        for: "00:05:00"
    action:
      - service: switch.turn_on
        target:
          entity_id: switch.water_heater

  - alias: "Turn off water heater when importing"
    trigger:
      - platform: numeric_state
        entity_id: sensor.grid_power
        above: 200
        for: "00:02:00"
    action:
      - service: switch.turn_off
        target:
          entity_id: switch.water_heater
The for: duration prevents rapid cycling — the grid power must sustain the threshold for the specified period before triggering. Adjust the 5-minute/2-minute windows to match your inverter's response time and load's thermal mass.
Homelab-Specific: Shift Docker Workloads to Solar Peak
If you run a homelab alongside your solar system, you can time compute-heavy tasks to coincide with peak generation (typically 10 AM–2 PM). Examples:
- Plex transcoding — Trigger a library scan or pre-transcode job via HA's REST command to the Plex API when battery is above 80% and solar is above 3 kW
- Nightly backups — If backups normally run at 3 AM (grid power), shift the HA automation trigger to check for solar surplus first; fall back to the 3 AM window only if surplus hasn't materialized
- Docker image pulls — Use HA's shell command integration to run
docker compose pullon the homelab host when solar conditions are favorable
This requires the Home Assistant rest_command or shell_command integration and either API access to the relevant services or SSH access to the Docker host.
Notification Automations
A few high-value alerts to configure:
- Low battery SOC — Alert at 20% and 10% remaining, especially during cloudy multi-day periods, so you can manually shed loads before the battery cuts out
- Daily production summary — Send a message at sunset with total kWh generated, total imported, total exported, and net grid cost; useful for tracking against monthly estimates
- Inverter fault — Alert immediately if inverter reports a fault code; some faults (arc detection, ground fault) require prompt action
For notifications, the Gotify and Discord integrations work well in a self-hosted homelab context. Configure them under Settings → Integrations and use the notify.gotify or notify.discord service in your automation actions.
Energy Monitoring Hardware
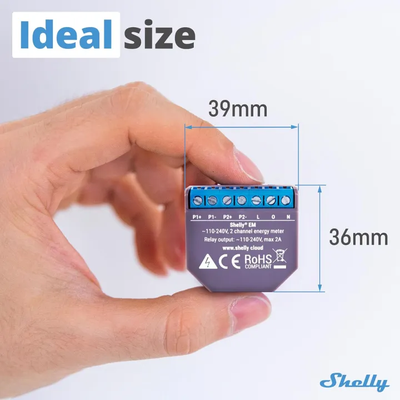 A Shelly EM energy monitor — this tiny device (39mm x 36mm) fits inside your electrical panel and monitors your entire home's energy consumption via WiFi. It connects to Home Assistant locally with no cloud required. Photo: Lazada PH
 Where to install CT clamps inside your electrical panel — one on the grid feed wire (measures import/export) and one on the solar inverter output (measures production). No cutting or splicing required.
Some inverters — particularly string inverters without a hybrid module — don't report full household consumption data, only generation. To track what your house is actually consuming and get accurate import/export figures, you need a dedicated energy monitor at the distribution board.
| Device | Channels | Connection | Price | Best For |
|---|---|---|---|---|
| Shelly EM | 2 CT clamps | WiFi (local HTTP/MQTT) | ~₱2,000 | Grid monitoring, single-phase homes |
| Shelly Pro 3EM | 3 CT clamps | WiFi/Ethernet (local) | ~₱4,500 | Three-phase connections, professional installs |
| Emporia Vue Gen 3 | 19 channels | WiFi (ESPHome flashable) | ~₱5,500–8,500 | Circuit-level monitoring across entire DB |
Shelly EM is the entry point: two CT clamps let you measure grid import/export at the main breaker. Local API and MQTT support means no cloud dependency, and it integrates natively with Home Assistant.
Shelly Pro 3EM handles three-phase supplies — common in Philippine homes with larger solar installations (above 5 kWp) or three-phase air conditioning. DIN-rail mounted, Ethernet port for wired reliability, and still fully local.
Emporia Vue Gen 3 is the circuit-level option. With 19 CT channels you can monitor every major circuit in your distribution board individually: air conditioning, appliances, lighting, EV charger, and the solar feed all get their own sensor. The Gen 3 hardware can be flashed with ESPHome firmware for full local control without the Emporia cloud account.
What do these look like? (click to see product photos)
- Shelly EM: View on Lazada — a small rectangular module (~5cm wide) that clips onto a DIN rail inside your electrical panel. Two CT clamp cables plug into it — these are donut-shaped clips that go around your main power wire without cutting it.
- Shelly Pro 3EM: View on Lazada — a wider DIN-rail module with 3 CT clamp inputs and an Ethernet port. Professional-grade, typically installed by an electrician.
- Emporia Vue Gen 3: View on Amazon — a compact hub (~10cm) with a bundle of 16 thin CT clamp cables that fan out like an octopus inside your electrical panel. Each clamp clips around one circuit's wire.
- What's a CT clamp? A "current transformer clamp" is a hinged plastic donut that clips around a wire — it measures how much electricity is flowing through without needing to cut or splice anything. Think of it like a clip-on microphone but for electricity. View CT clamps on Lazada
Installation note
CT clamp monitors (small clip-on sensors that measure electricity flowing through a wire without touching the wire itself) are non-invasive — they clip around the cable without breaking the circuit. However, installation inside a distribution board (your circuit breaker box) should be done by a licensed electrician (PEC 2017 compliance). The monitoring hardware itself is safe to configure and connect to Home Assistant yourself once physically installed.
Previous: ← Component Deep-Dive | Next: EV Charging →